How to Install Window Box Cages | Iron and Aluminum

Disclaimer: This Installation Guide is for the installation of window boxes on the exterior of buildings that have wood, stucco, HardiBoard, vinyl, brick, stone or masonry. It is suggested that you do not work alone, use proper lifting techniques and exercise due caution in and around your work area. The instructions which follow are suggested guidelines only as the construction and condition of your walls may vary. A window box that is improperly installed may be a hazard and could potentially cause injury or damage to persons or your property. To ensure years of window box satisfaction and longevity, we recommend you have a licensed contractor or qualified handyman install or advise you.
Overview/General
The guidelines which follow are designed for the most common forms of exterior siding used on homes - specifically Wood, Shake/Shingle, Stucco, HardiBoard or Vinyl. If you are mounting your box into Brick, Stone, Masonry or Block-mounting these boxes requires use of lag shields for proper mounting. (See Step 5)
Tools Needed
Drill & 1/8" drill bit (& 1/2" drill bit for brick or masonry siding).
Level, tape measure & pencil
Tape Measure.
Stud Finder (Electronic or Magnetic). (Other methods exist to find studs such as tapping wall with hammer head - a deep, hollow sound indicates no stud, keep tapping until sound changes to higher more solid sound.)
Socket Wrench
Hammer/Mallet (for inserting lag shields into brick)
Materials
Iron or Aluminum Window Box
Lag Bolts (3" length x 1/4" diameter )
Brick or masonry mounting also requires 1/2" diameter lag shields
For 24" Length Boxes use 2 bolts into studs
For 30," 36" or 48" Boxes use 4-6 bolts into the studs
For 60" or 72" boxes use 6-8 bolts into the studs
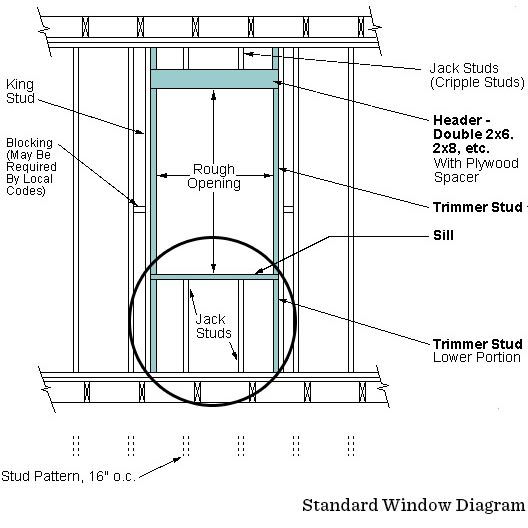
1. Locate and mark studs in wall beneath window framing.
Using a stud finder (see image), locate and mark the studs on your wall in the area that you will be mounting your window box. Most studs are found 16" on center but stud spacing underneath windows is varied and not always predictable. It is recommended that you mount your window box to as many studs as practical.

2. Determine how far below the window you want the window box to sit and draw a level, horizontal line.
There is no "right or wrong" way to position the box; It is strictly to your taste. If you have a water-ledge as part of your window sill, make sure to provide adequate clearance beneath the ledge to allow for any liners or pots to be removed and replaced.

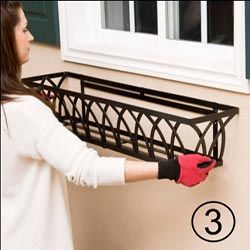
3. Hold the cage centered beneath your window so that the top of the cage aligns with the level line drawn in step 2.
Then mark the locations of the predrilled holes in the back of the cage and the open area across the double iron strap through which you will be bolting the box. Make sure these holes align with the studs marked in Step 1. If your box does not come with a double iron strap, use the pre-drilled holes in the back of the iron cage and know that it's safe to drill additional holes in the iron if necessary to align with your studs. Make sure to use a drill bit made for metal surfaces.
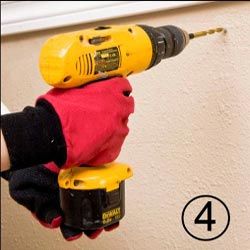
4a. For wood, stucco, vinyl, shake/shingle, and HardiBoard siding, drill 1/8" pilot holes in wall at marks made in Step 4.
Make sure the pilot holes go into the studs in the wall. A 1/8th in pilot hole is the right diameter for the 1/4" Diameter Lag Bolts you should be using. If your wall is made of brick, masonry or block, see Step 5b.
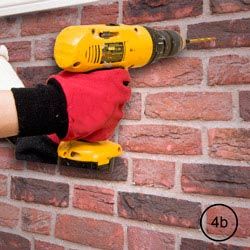
4b. For brick, stone, block or masonry siding, use a 1/2" drill bit to bore pilot holes in the wall at the locations marked in Step 4.
The 1/2" diameter holes in brick make room for the 3/8" lag shields you will insert into the wall. Gently hammer the lag shields into the wall. The lag shields are now ready to accept your 1/4" diameter bolts.
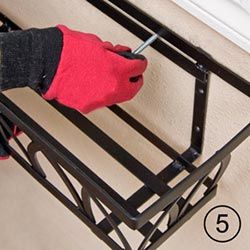
5. Use a socket wrench to bolt the cage to the wall and enjoy!
There is no need to use washers over the bolt heads. Be careful to not tighten the bolt so far into the wall that you strip the bolt head.
